REVscene - Vancouver Automotive Forum


Welcome to the REVscene Automotive Forum forums.

Registration is Free!You are currently viewing our boards as a guest which gives you limited access to view most discussions and access our other features. By joining our free community you will have access to post topics, communicate privately with other members (PM), respond to polls, upload content and access many other special features. Registration is fast, simple and absolutely free so please, join our community today! The banners on the left side and below do not show for registered users!

If you have any problems with the registration process or your account login, please contact contact us.


Go Back   REVscene Automotive Forum > Automotive Chat > Vancouver Auto Chat

Vancouver Auto Chat 2016 VAC Community Head Moderator: Raid3n

Reply
 
Thread Tools
Old 01-09-2010, 04:48 PM   #26
Willing to sell body for a few minutes on RS
 
quasi's Avatar
 
Join Date: Jul 2001
Location: Cloverdale
Posts: 11,581
Thanked 3,789 Times in 1,349 Posts
Failed 83 Times in 42 Posts
Quote:
Originally Posted by shantz View Post
If you've got a lot of chips, make an ICBC claim. It will cover a repaint of all the damaged areas as well as replacement of any parts that cannot be repaired (chrome grille, mirror caps etc.) In addition it will cover a new windshield! All you'll have to cover is your comprehensive deductible... and because it's a comprehensive claim, it doesn't affect your safe driving history or your discount structure.

www.bavara.ca
If bad enough I totally agree. 10 years ago I took my integra to Big White and it got totally fucked up from the sand and shit on the Coquihalla. I had a broken foglight, broken windshield, tons of dents and my front end looked like swiss cheese. ICBC repaired everything and repainted my car for my comp. deductable.
Advertisement
__________________


“The world ain't all sunshine and rainbows. It's a very mean and nasty place... and I donīt care how tough you are, it will beat you to your knees and keep you there permanently, if you let it. You, me or nobody, is gonna hit as hard as life. But ain't about how hard you hit... It's about how hard you can get hit, and keep moving forward... how much you can take, and keep moving forward. Thatīs how winning is done. Now, if you know what you worth, go out and get what you worth.” - Rocky Balboa
quasi is offline   Reply With Quote
Old 01-09-2010, 04:51 PM   #27
MOD MOD MOD MOD MOD
 
nabs's Avatar
 
Join Date: Dec 2003
Location: vancouver
Posts: 5,869
Thanked 3,517 Times in 1,161 Posts
Failed 212 Times in 81 Posts
i got a chip in my winshield a few weeks ago, eventually turned into a crack across, but its not obstructing my view so im just living with it. it may cost too much to replace the glass.
__________________
Quote:
[03-07, 03:26] Yodamaster - The feeling when you quickly insert without hitting the sides
nabs is offline   Reply With Quote
Old 01-09-2010, 05:22 PM   #28
Banned (ABWS)
 
Join Date: Apr 2009
Location: internet
Posts: 818
Thanked 406 Times in 127 Posts
Failed 413 Times in 103 Posts
Do this

http://www.autopia.org/forum/click-b...-56k-owie.html

Quote:
Originally Posted by Picus View Post
Hey guys. I posted this at a G35 forum I frequent because I got a lot of questions about chip repair back when I did a really heavy chip repair session on my car (some of you may remember it from last year.). I thought I'd post here too just for future reference, and because I finally got around to doing some spring cleaning on my car.

Overall it was in decent shape. Some swirling from a year of washing/daily driving, some light marring, and a few rock chips that needed repairing. The major issue was a big scratch in the rear fender that a bicyclist put in when he decided to play chicken with me.

Process is in the post, products used were Sonus SFX-2 and 3 via LC orange and white pads on a PC. The afters of the fender are pre-LSP, and the after-afters are with Zaino Z2. I decided to give Zaino another try since I still have a couple bottles left. I was more impressed with the results this time than before. Cheers.

================================================

Remember, everything in this post is my opinion only. There ARE other ways to do this and lots of different products you can use. Also, remember that trying this is at your own risk. Damaging a paint via PC is hard, but with sandpaper it's very easy. So let's start:

What you'll need:

1) Matched paint. A jar is best, a pen is ok. You can get it at a dealer or local automotive store.

2) A fine paint brush (medium bristles, fine tip), and/or a plastic toothpick.

3) Rubbing alcohol, some automotive wash soap, access to water.

4) Some sandpaper. I like Meg's unigrit 2000 and 3000. Non-unigrit and less than 2k at your own risk.

5) A sanding block. Both soft and hard work. I prefer soft as it is easier to manipulate and can go around curves.


6) Polishes. What kind of polishes will depend on if you're using a PC or not. I will be using a PC, but will include by-hand instructions.

Onward.

First make sure the car has been washed, what wash you use is up to you. How you wash it is also up to you but remember, two buckets and a quality mitt (or 3).

Second, make sure the area you're repairing is clean. By clean I mean no sealants, waxes, nothing. To do this you'll need to a) use a cleaner polish or b) (my choice), wipe with ISA:water. What's that? It's rubbing alcohol (the regular 70% kind) mixed 50:50 in a spray bottle with water. Spray the area thoroughly and wipe. Do this twice. You want *no* dirt, wax, anything in the chip.

Alright, so filling in the chip/scratch. Two ways to do this, first I will go with my choice for chips and that's using a plastic toothpick. Before I go on, there are good instructions on how to do this here: http://autopia-carcare.com/inf-paint-polish-clinic.html. I basically follow the same process. Dip the toothpick into the paint about half way up, then touch the tip of the pick to the center of the chip and capillary action will pull the paint into the chip. It will take a couple passes to level it out so let the paint dry at least 4 hours in between and be patient.

The other way is good too, but less accurate. It's good for scratches that are larger than chips and would take too long to fill in via the toothpick method. Put a little paint on to your brush (very little, immerse maybe 1/4 of the brushes tip), and touch the tip to the center of the scratch. You'll see the paint pull into the scratch. Depending on the size begin to move the brush in one direction through the scratch. Repeat this every 4 hours until you're level.

Whether or not you add a layer of clear is up to you. I normally do as I find it makes the paint match better after sanding/polishing.

Alright, so now you have a blob, sort of like this:


Or in the case of a scratch, like this:


No go have a beer and wait until tomorrow (or better yet, two days from now, then come back). This is important - let the paint dry or odds are you'll pop the chip right out when sanding.

The night before you said put the sandpaper in some water and let is soak overnight.

Alright so sanding time. This is the tricky part so go slow and be patient. Make sure the paper is right on the block (you'll probably have to cut it) and then spray the blob with a mixture of water and some soap (just mix some in a spray bottle), spray liberally and then start sanding. I like to sand against the blob, so the figure out which way the blob is longer and sand the opposite way. Sand very light, apply almost no pressure and try to keep the block flat. Also, sand in one direction, not back and forth. It's counter-intuitive but it helps. So swipe one way, lift, then repeat. Check your work often by wiping away with a mf towel. Before you do spray the area liberally again with the soapy water to lift up any particulates. You're done when the blob is level with the paint (as in, you can not feel it by running your finger over it gently). You'll have something that looks like this:


And you'll probably be pretty nervous, but you're ok. As long as you were patient and sanded lightly you will not have removed more than a fraction of your clear. Just be careful!

Now clean the area with your ISA:water and get ready to polish.

If you're polishing by hand I hope you used uni-grit and 2500+ paper, because otherwise you're going to be really sweaty when this is over. Assuming you did grab your polish of choice. Products I like by hand are:

Sonus SFX-2
Poorboys SSR2.5
Menzerna Intensive Polish
Meg's ScratchX

I'd start with something like Sonus SFX-2 or PB's 2.5 on a cotton applicator. Apply a dab about the size of a quarter then start to rub. You *will* need to apply pressure and move quickly. You're trying to generate heat. Repeat until the marring is gone, or 90% gone then use ScratchX to clean it up. You should have nice smooth paint, and the chip should be 100% gone. Remember, by hand is tough work and the results are often difficult to achieve - I always recommend investing in a PC, but that's just me.

By PC I like the same products (minus the ScratchX and add Optimum Compound), or if you're in a hurry SFX-1, Menzerna PG, or PB's SSR3. I like to take my time and don't normally advocate using products that are over-kill in the name of speed - as such I usually use SFX-2 or Optimum Compound via an orange LC pad (medium abrasive), and just polish as normal. Apply a couple dabs to the pad, work in at speed 3 for 20-30 seconds and apply enough pressure than the PC almost bogs down, then kick it to 6 and apply the same pressure until the polish flashes. One or two passes will take out 2500-3000 grit marks easily.

Now, if you have some marring that isn't coming out you can do one of two things. One, use a stronger combo of pad+polish, or two, sand again with a higher grit then polish. I normally do option two but Iam getting pretty decent at sanding. If you're nervous about it I'd stick with option 1.

When you're done clean again with isa:water then apply the wax/sealant on your choice and call it a day. Here are the afters of the chips/scratches I posted above.

The blob was in the circle.


Scratch was in the circle.


Cheers.
jeff_alexander is offline   Reply With Quote
Old 01-09-2010, 05:24 PM   #29
Banned (ABWS)
 
Join Date: Apr 2009
Location: internet
Posts: 818
Thanked 406 Times in 127 Posts
Failed 413 Times in 103 Posts
Here is another

http://www.detailingworld.co.uk/foru...ad.php?t=20127

Quote:
Originally Posted by Breezy View Post
A common sight on everyones bonnet is stone chips unless you've just had it re-sprayed but even then they are still inevitable!


So after spotting a few on mine I thought I would have a go at repairing them after reading a couple of repair guides. Firstly I got hold of some touch up paint from Paints4U you can alternatively just buy a touch up stick from the stealers but for the same price i got a 100ml tin of paint and 30ml clear lacquer which was a perfect colour match too it also came with a fine artists brush.

I also got some IsoPropyl alcohol to clean out all the dirt, crap, polsh & wax from the stone chips, once this was done i went round filling the chips with paint and making sure the paint filled the chip and not the area around it as this can easily be done if you use a brush thats too thick you need to fill the chip so that the paint is raised over the area of the chip.

once left to dry the bonnet looked like this with blobs of paint


the wet & dry paper I used was Meguiars unigrit 2500

The next job was to wet sand the blobs of paint down to the same level as the existing paint and the best way i found to do this and keep the repairs to the local area was to wrap a small bit of sandpaper around the end of a flat piece of plastic (aka a bicyle inner tube remover!) or a pencil and gently rub down the raised paint and then level it out with the rest of the surface.

i used plenty of water with fairy liquid which foamed up nicely and acted as a good lubricant and also soaked the sandpaper in some fairy liquid before hand.

some nice sanding marks afterwards!


these were easily removed using my porter cable polisher with a "4 lake & country orange light cut pad & Menzerna Intensive polish, the whole bonnet was then followed up with Menzerna Final Finish Polish (P085RD) with a "6 Sonus SFX blue finishing pad and 2 coats of Colinite 476s wax.

if you dont have a porter cable you can easily remove the sanding scratches by hand using 3M Perfect-It III fine cut compound

i can't see the chips anymore!


jeff_alexander is offline   Reply With Quote
This post thanked by:
Old 01-09-2010, 05:26 PM   #30
Banned (ABWS)
 
Join Date: Apr 2009
Location: internet
Posts: 818
Thanked 406 Times in 127 Posts
Failed 413 Times in 103 Posts
Basic tips on hand wetsanding the car

http://www.autogeekonline.net/forum/...echniques.html

Quote:
Originally Posted by Mike.Phillips@Autogeek View Post
Basic Hand Sanding Techniques

Basic Hand Sanding Techniques

Soak your papers at least 15 minutes before use.
The Nikken Finishing papers have a latex rubber impregnated paper backing that is waterproof and this prevents the finishing paper from breaking-down into pulp from over soaking. I've personally soaked these paper in water for over 2 years with no visible sign of deterioration. (This was by accident as I lost a sealed Tupperware container filled with water and Nikken papers I used to take with me to demonstrations)

It's possible for grit particles to enter into your water source so if you can, use Grit Guards in the bottom of your bucket.

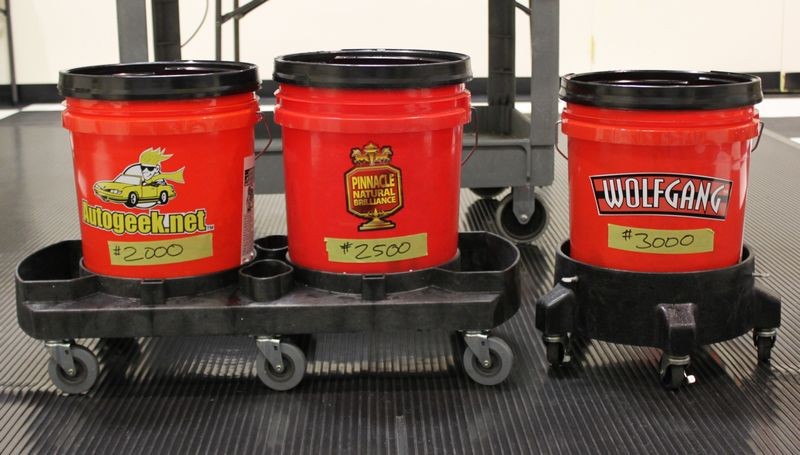
If you want to get really D.O., you can place your papers in dedicated buckets and also use dedicated backing pads for the different grits. The idea is to avoid instilling deeper scratches as you work upward to less aggressive products and to avoid any kind of abrasive particle trapped between your sandpaper and the finish to avoid Tracers.

Dedicated buckets for specific grits of paper. Grit Guard Inserts in the bottom of each bucket.
(You could theoretically use 2, even 3 Grit Guard inserts in each bucket for even more protection)
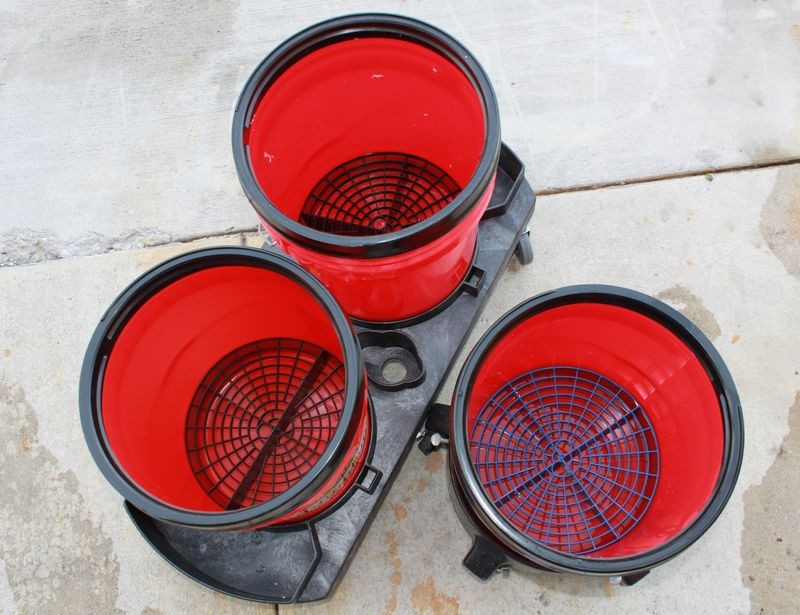


Try to place your papers in water and soak them at least 15 minutes before sanding. I usually soak my papers overnight and sometimes a few days before sanding.


Place different grit papers in their own dedicated water bucket
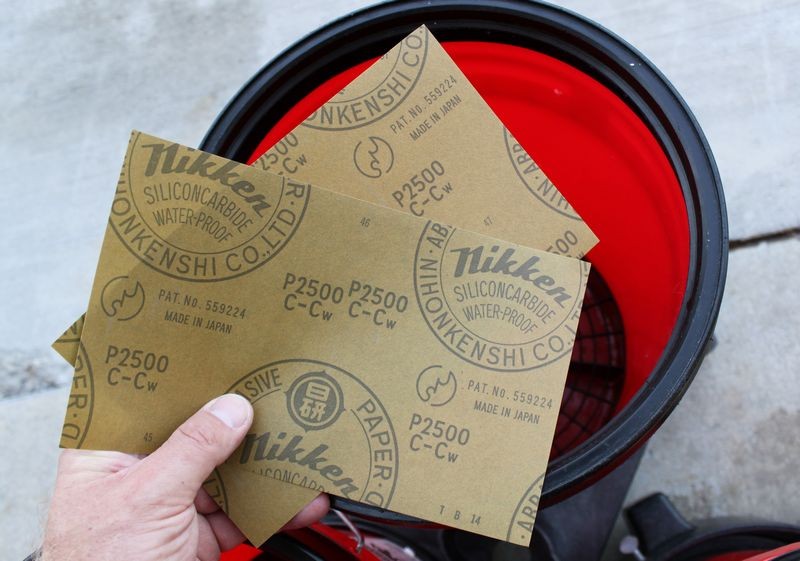


Final sanding should be done with the highest quality grit particle size paper you can obtain. At this time with Nikken that's #3000 grit.
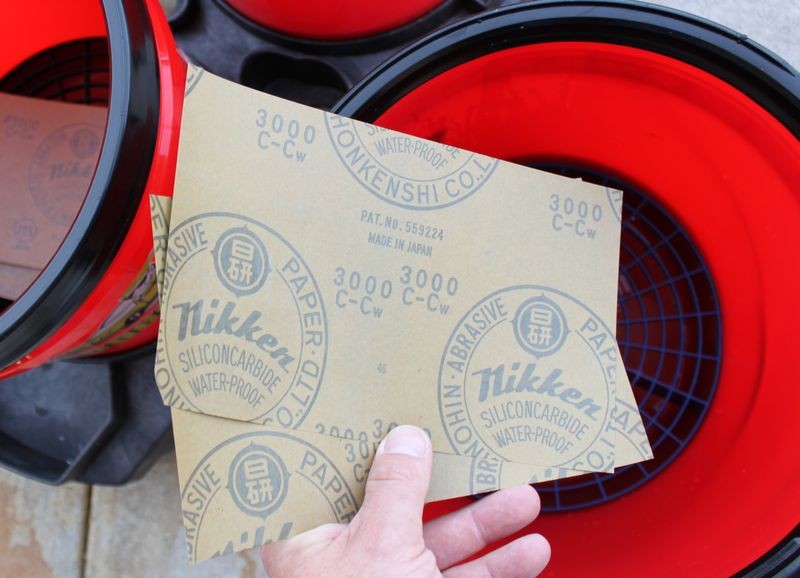


Add just a few drops of a quality car wash soap to help add lubricity to your water. If you're working on Fresh Paint and/or in a Body Shop, (Fresh Paint Environment), then you want to make sure you're using a body shop safe soap.
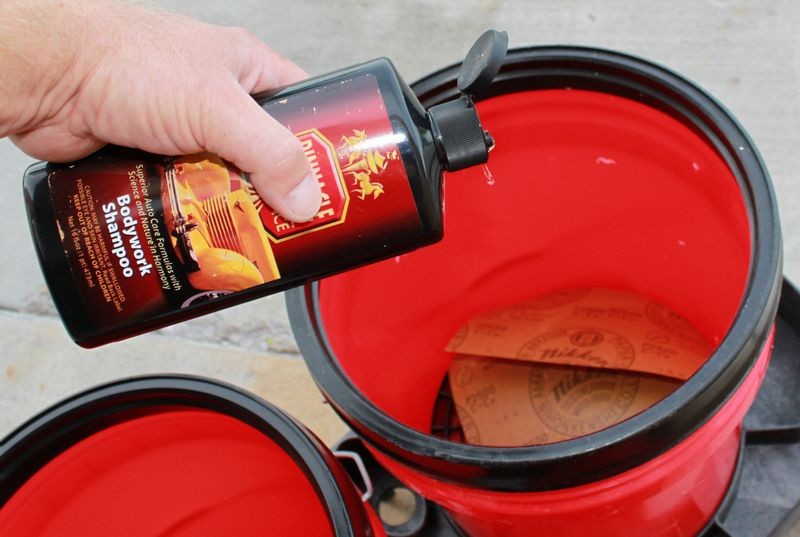


Add fresh, clean water. Also be sure to wash and rinse out your buckets before starting, everything must be surgically clean before placing your papers into the buckets.
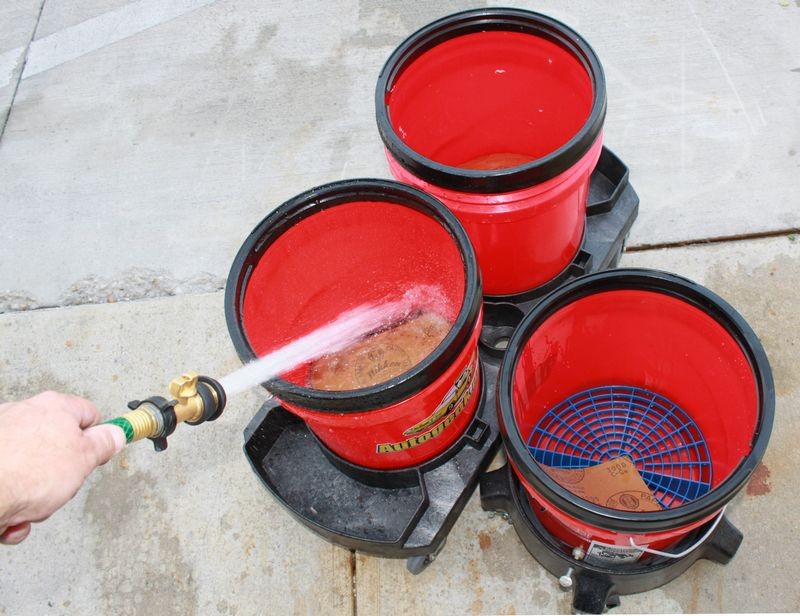


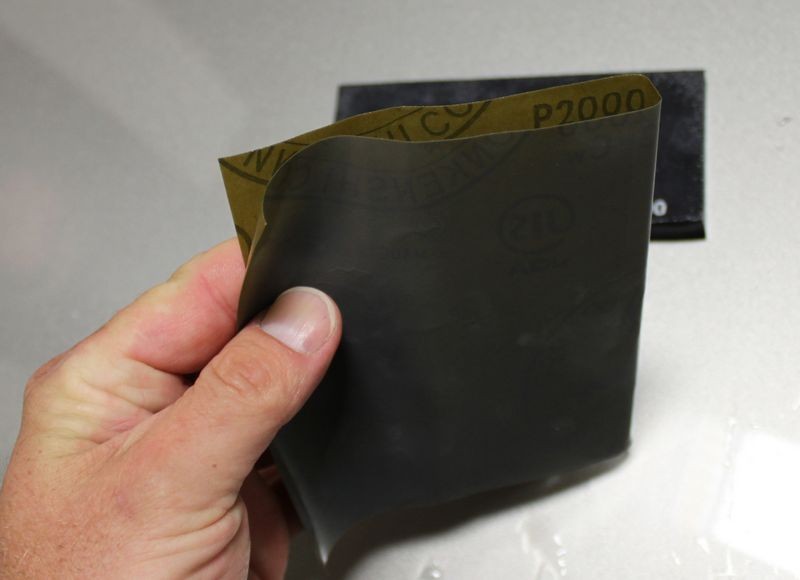
It's normal for your papers to roll up like this,


Mark you buckets so you can quickly and easily identify which buckets hold which papers.


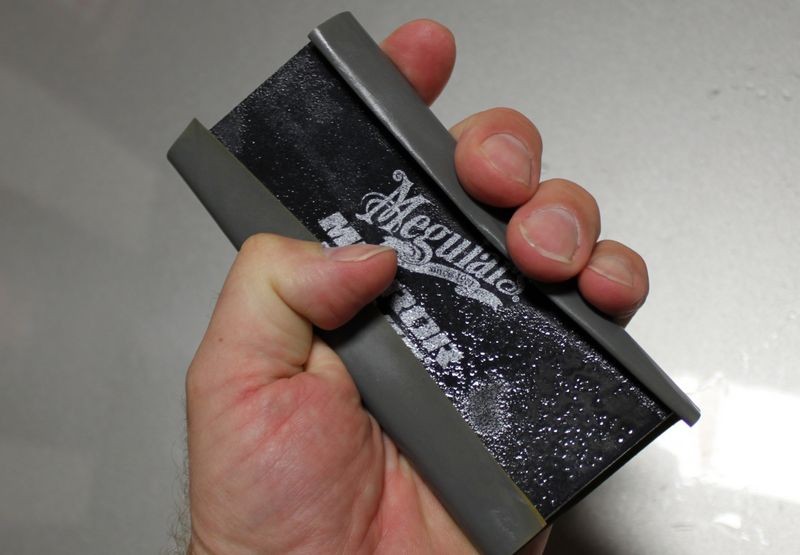
There are two common ways to wrap your paper around a backing pad, my personal preference is to wrap each half-sheet around completely around the backing pad.

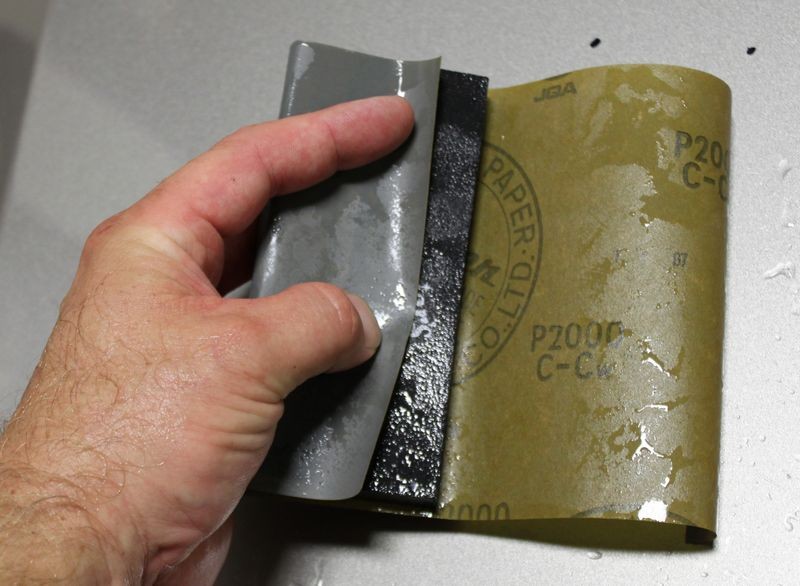
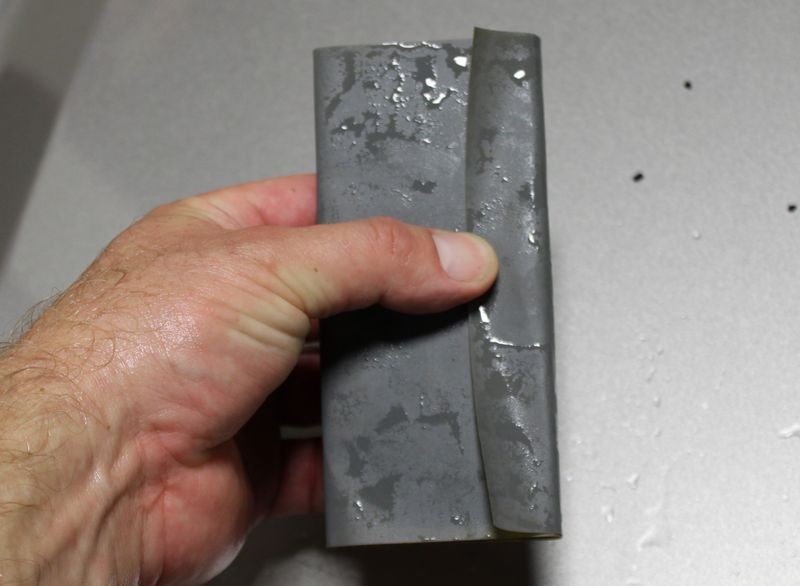


One side is covered with a seamless portion of sandpaper. This of course is the side you sand with.
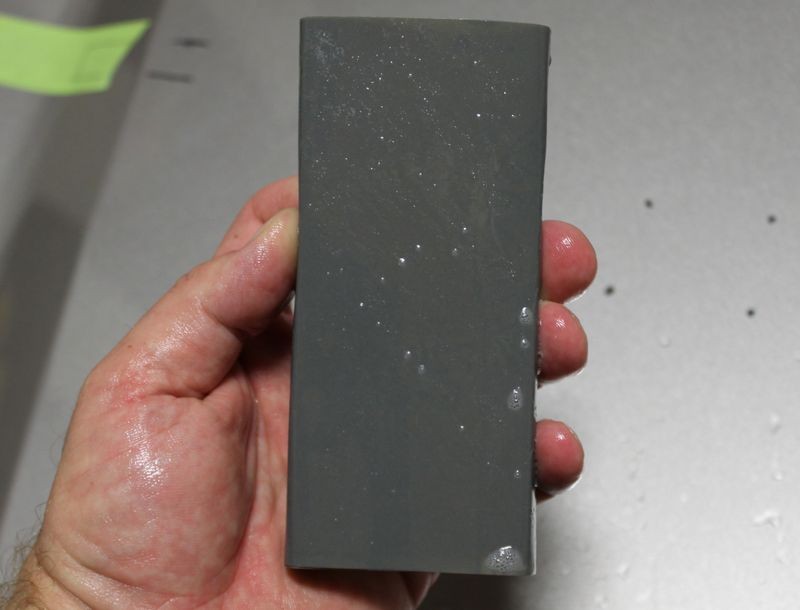


Another option is to fold a single half-sheet of paper in half once and then fold this around your backing pad. Some people like this method better and there are some that say it's possible to put deeper scratches in the paint from the sides of the backing pad due to the way the paper will tend to bow. If you hold your backing pad at an angle when sanding this shouldn't be a problem but most people don't concentrate enough on the task-at-hand and sand with the backing pad perpendicular to the direction they are sanding or moving their hand. So if it can happen, then it might be an issue and I just wanted to point this out in an effort to be thorough.

Folding a sheet in half and wrapping it around a backing pad.


One side is completely covered, this if course is the side you sand with.


Half sheet folded around the backing pad.
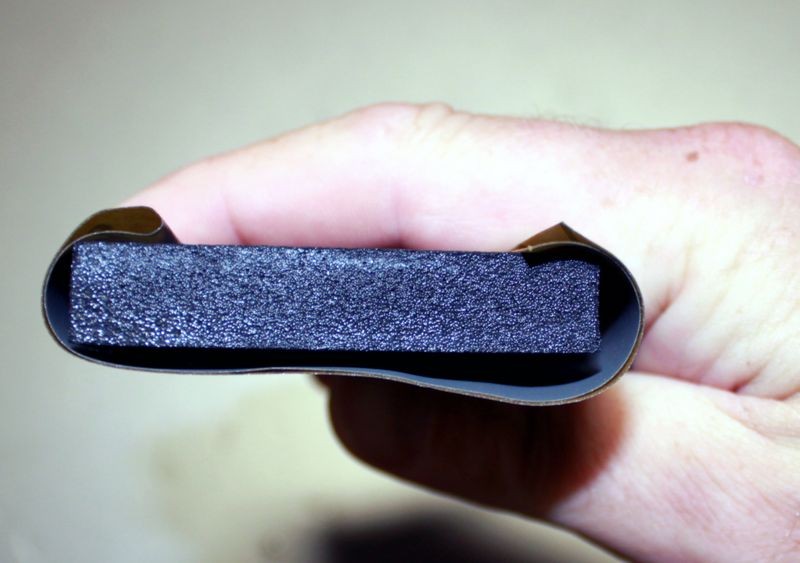


What it looks like from a top view.


Each person should try both ways and decide for themselves which method works best for them. Also, finding a way to grip the backing pad and at the same time place equal pressure over the top surface of the backing pad is tricky. I find I have to grip the sides with a pinky and a thumb and then use my 3 middle fingers to apply pressure to the back face of the pad in order to sand without losing grip or control. Practice and find a way that works for you.

Next, use plenty of water from a clean source to lubricate the surface while sanding. Add a little soap, (a few drops is all that's needed, don't go crazy with the soap), and as you sand, continually spray water to the section you're sanding as this will make each stroke easier. Seriously, spray water onto the surface after every other stroke or two you'll find the paper will cut a lot smoother.
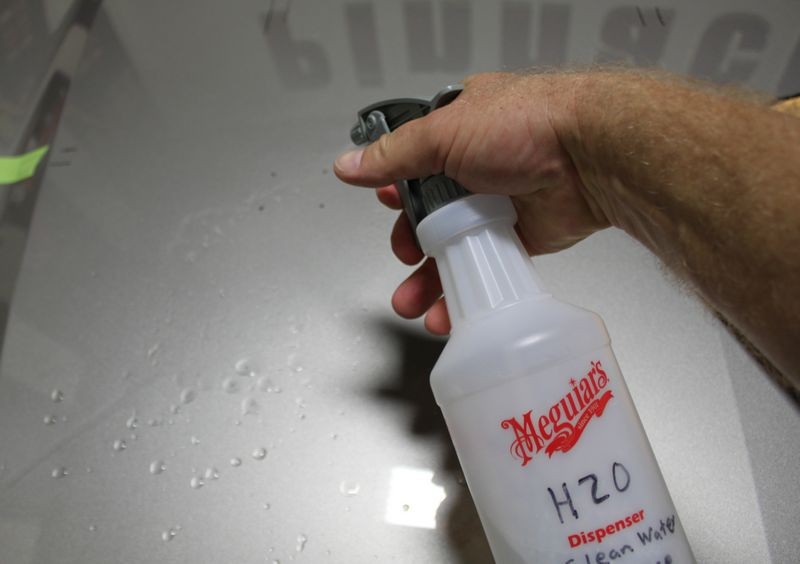


Hold the backing pad canted, or at an angle, see how the tip of the paper-wrapped backing pad is leading as I move my hand forward. Don't hold the pad squared-up as you sand because you'll tend to cut deeper ruts if you sand with the pad in perfect perpendicular alignment in the direction of your strokes.


Right - Hold backing pad at a little bit of an angle while making front to back strokes.


Wrong - Don't sand with the backing pad in a perpendicular alignment with your front to back strokes, you risk gouging or putting in deeper scratches where the paper is cutting on the outside edges of the length of the backing pad.


Note the direction of my strokes and note the angle at which my pad is laying on the paint with one of the edges leading. This is correct backing pad alignment for hand sanding.


You should see paint residue in your sanding water
The white stuff in the water is clear paint particles that have been sanded off. If this were a single stage paint you would see the color of the pigment in the water.


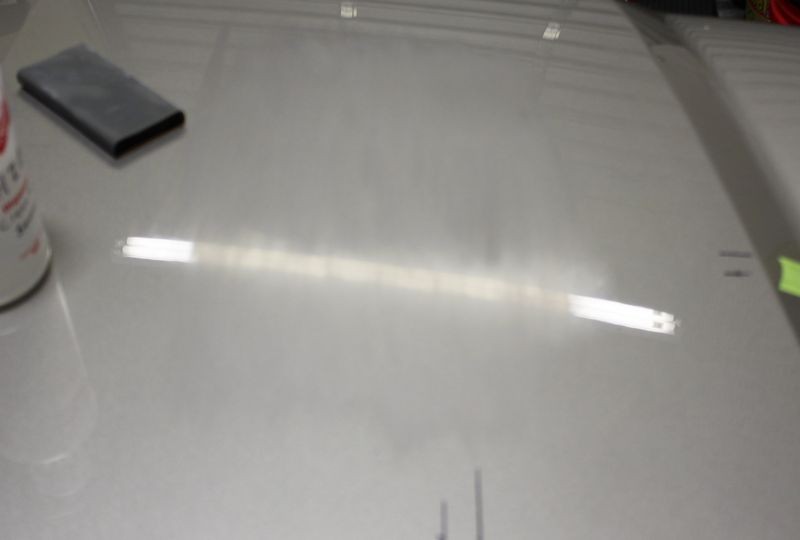
After
Close-ups with the overhead florescent tube light reflection on each section.


Size of area to hand sand


The size of the area you want to sand comes down to two rules of thumb,
20" by 20"
Let the panel be your guide
20" by 20"
For taking off the greatest portion of material you want to keep your work area to a manageable size of about 20" square or so... the reason for this is because,

You want to carefully remove only the necessary amount of material
You want to remove a uniform amount of material
While the above two listed items can read and sound like the same idea they are in fact different ideas.

1. Only remove the necessary material
Sanding removes paint and compounding removes paint, because you only have a limited amount of material or film-build to work with you only want to remove the minimum amount of paint to get the job done. An example would be removing Orange Peel. When removing orange peel you sand till the surface goes flat and then stop. There's no need to continue sanding after the surface goes flat as there is no more benefit, only loss of material, (material is the paint).

2. UMR = Uniform Material Removal
Since your sanding section by section, the ultimate goal will be to remove the same amount of material in a uniform manner over the entire panel and/or the entire car. This takes practice and concentration on the task at hand.

Back to the 20" by 20" size section...
Now let me explain how this ties into the size of area you sand. In the case of the general rule of thumb of sanding a section 20: by 20" the farther away from your body you move your hand, the more likely you'll exert less pressure than when your hand is closer to your body. So the longer your stroke, the more likely that you'll remove less paint the farther your hand moves away from your body. This makes for uneven material removal. It can also lead to removing too much material in the area closer to your body. By keeping your sanding area to a arm's manageable area you'll improve the likely hood that you'll only remove the necessary amount of material to get the job done and you'll remove material equally over the section your sanding.


"Let the panel be your guide"


(When you read the above sentence, use your best Yoda impersonation)


You won't always be working on a perfectly square, flat hood, there are many places where you'll be sanding thin panels of paint like around the top portion of a fender, the A and B pillars, complex panels that make up the design of a body style that have raised or hard body lines. In these case you need to let the panel be our guide and this may mean sanding very small areas or areas that are longer than they are wide.


Here's an average size hood that I've taped off into 6 section which is how I would knock down or remove the majority of paint off this panel. After sanding the first section, all future sections would also overlap into the previous section(s) for good UMR.
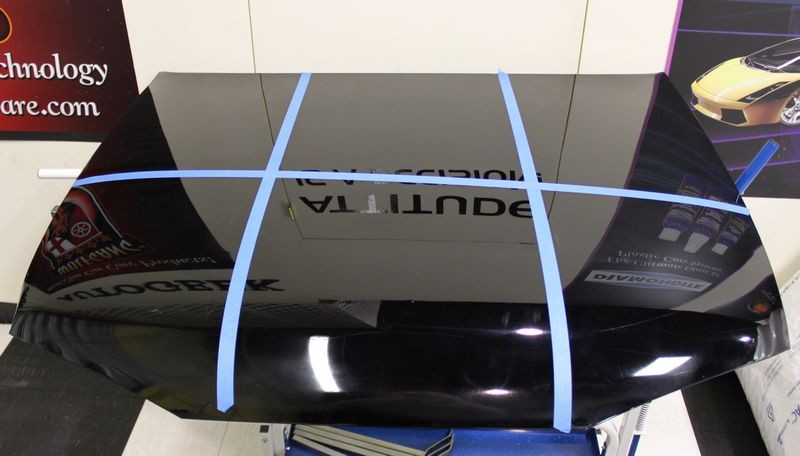


For the final sanding work I would larger section using higher grits as a way of tying all the sections together for even UMR. After wiping the hood clean and inspecting then I would compound the paint to remove the sanding marks.

This is just my way, please feel free to find your own way and if it's different than mine, please feel free to start your own thread documenting your approach with pictures and your explanation of your process.


Further Resourses
How long will a half sheet of wet/dry sandpaper last before it stops cutting and you need to replace it?
Wet-sanding - Fresh Paint vs Factory Paint
RIDS and Feathersanding - A Highly Specialized Technique by Mike Phillips
Removing Orange Peel & Sanding Marks with the Griot's ROP and the Wolfgang Twins


Last edited by jeff_alexander; 01-09-2010 at 05:32 PM.
jeff_alexander is offline   Reply With Quote
This post thanked by:
Reply


Posting Rules
You may not post new threads
You may not post replies
You may not post attachments
You may not edit your posts

BB code is On
Smilies are On
[IMG] code is On
HTML code is Off
Trackbacks are On
Pingbacks are On
Refbacks are Off


All times are GMT -8. The time now is 05:28 PM.


Powered by vBulletin® Version 3.8.11
Copyright ©2000 - 2025, vBulletin Solutions Inc.
SEO by vBSEO ©2011, Crawlability, Inc.
Revscene.net cannot be held accountable for the actions of its members nor does the opinions of the members represent that of Revscene.net